Plugin Location
Prism Studio tools are packaged as VST3 plugins.
If you haven't already configured your DAW to scan for your VST3 directory, this guide will help you configure it to do so. We will cover a few different DAWs, which should provide clues for finding this within ones which we don't outline here.
page break
Ableton Live
Note: VST3 plug-ins are supported in Ableton Live 10 and above...
Windows
- Select
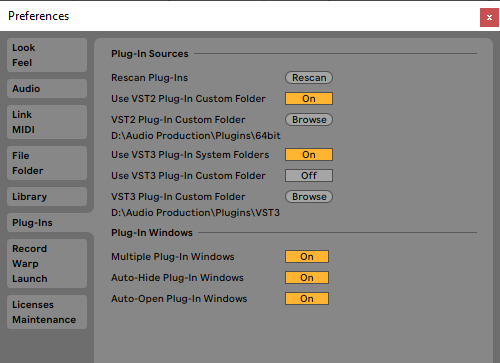
Options->Preferencesfrom the application title bar (or useCtrl+,) to bring up the application Preferences. - Select
Plug-Insfrom the menu on the left, and enableUse VST3 Plug-In System Folders. This will scan for VST3 plug-ins in the default folder (C:\Program Files\Common Files\VST3). - Click the
Rescanbutton to scan for plug-ins after enabling this option.
page break
macOS
- Select
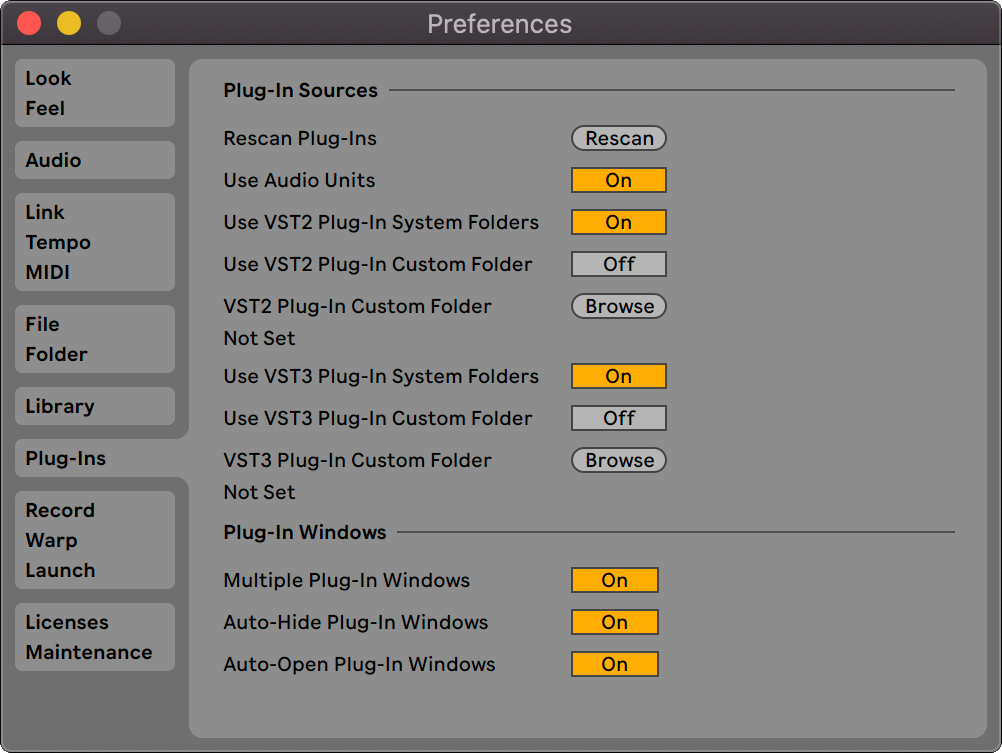
Preferencesfrom the application title bar (or useCmd+,) to bring up the application Preferences. - Select
Plug-Insfrom the menu on the left, and enableUse VST3 Plug-In System Folders. This will scan for VST3 plug-ins in the default folder (/Library/Audio/Plug-Ins/VST3). - Click the
Rescanbutton to scan for plug-ins after enabling this option.
page break
Reaper
Note: VST3 plug-ins are supported in Reaper 6 and above...
Windows
- Select
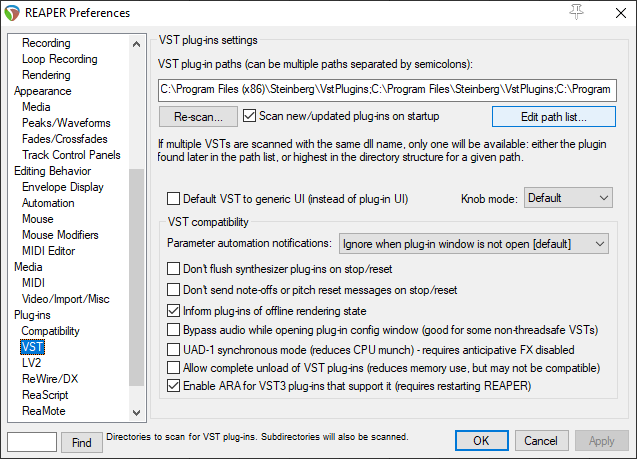
Options->Preferencesfrom the application title bar (or useCtrl+P) to bring up the application Preferences. - Under the
Plug-inssection on the left, selectVST. - Click the
Edit path list...button in the top right of the dialog, and ensure your system VST3 is included (C:\Program Files\Common Files\VST3). - If adding the VST3 path in the previous step, click the
Rescanbutton to scan for new plug-ins.
page break
macOS
- Select
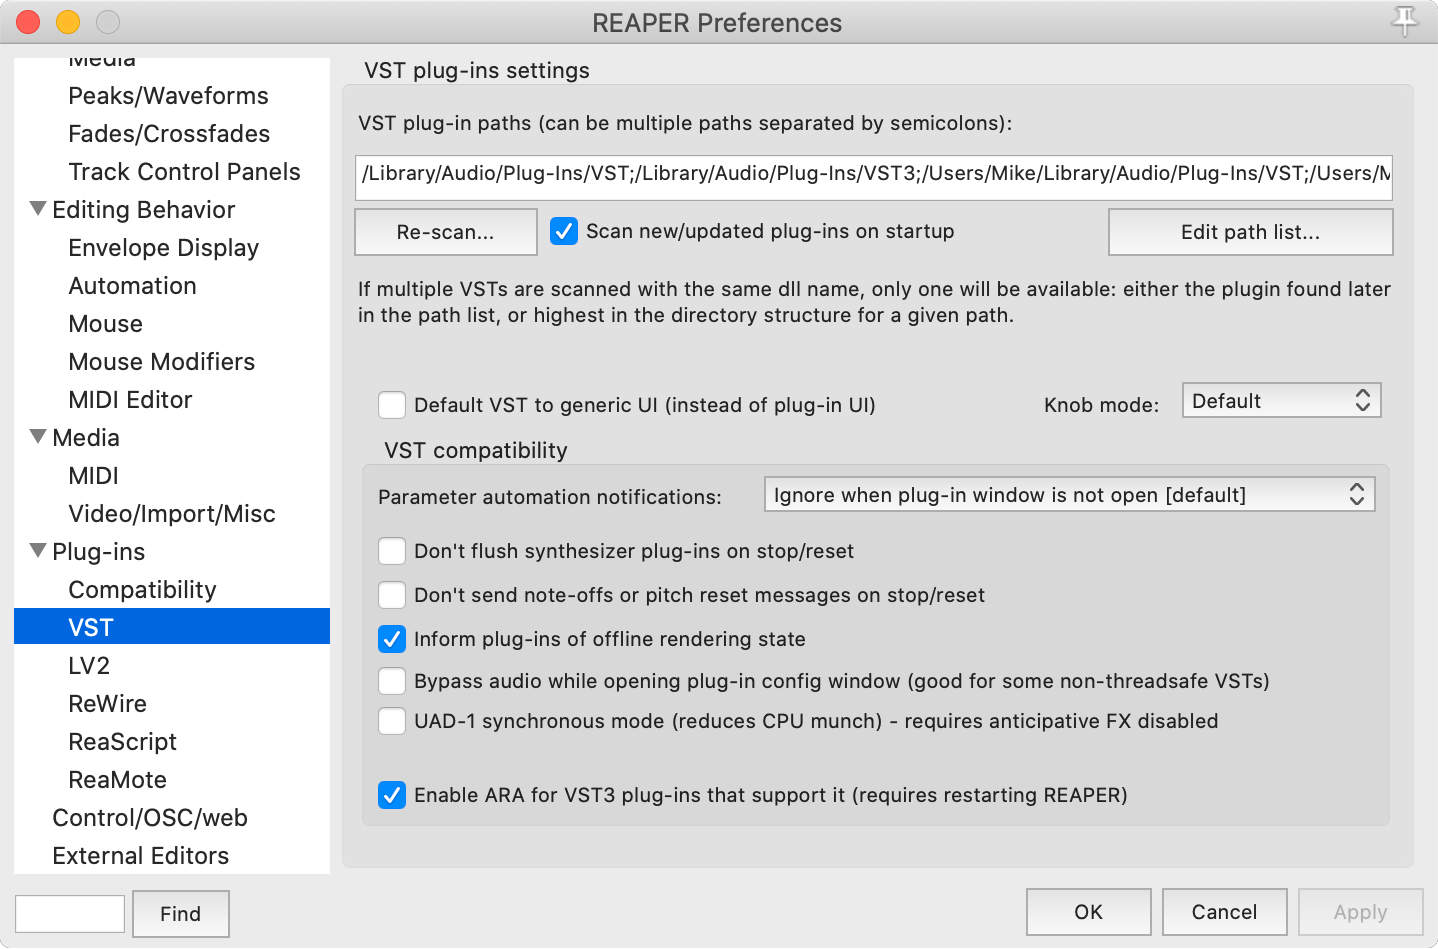
Preferencesfrom the application title bar (or useCtrl+,) to bring up the application Preferences. - Under the
Plug-inssection on the left, selectVST. - Click the
Edit path list...button in the top right of the dialog, and ensure your system VST3 is included (/Library/Audio/Plug-Ins/VST3). - If adding the VST3 path in the previous step, click the
Rescanbutton to scan for new plug-ins.
page break
Tracktion Waveform
Note: VST3 plug-ins are supported in Waveform 10 and above...
Windows
- Select
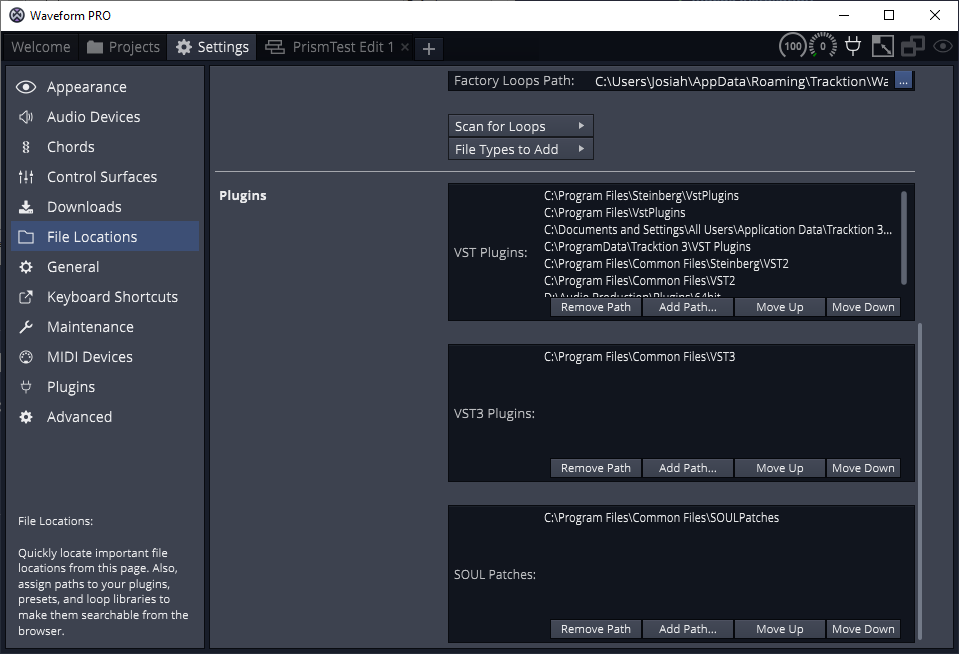
Settingsfrom the application title bar. - Select the
File Locationssection on the left, and scroll down to the Plugins area. - Ensure your system VST3 path is (
C:\Program Files\Common Files\VST3) is included in the VST3 Plugins section. If not, click theAdd Path...button and add the system path.
- Select the
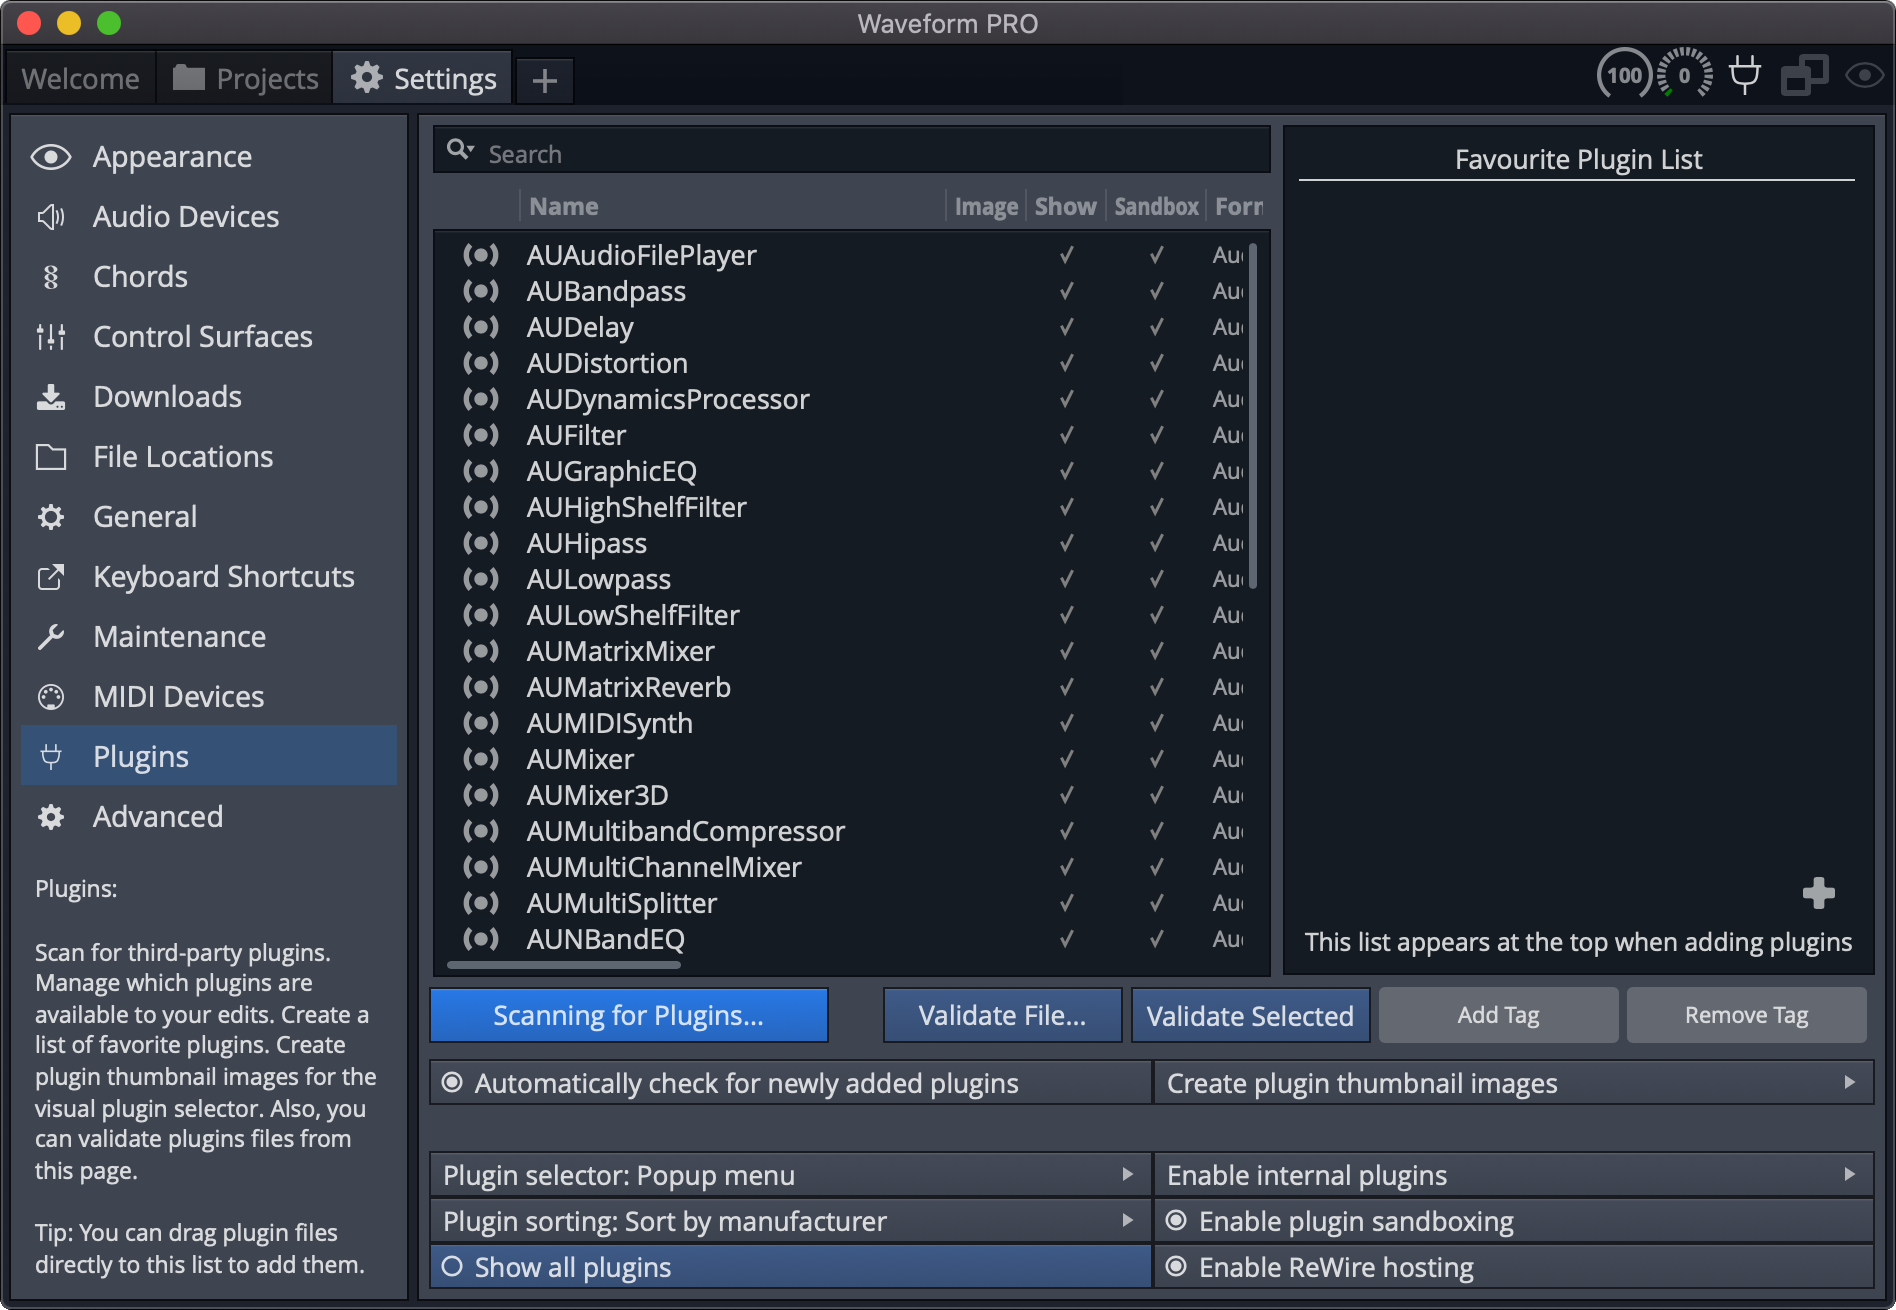
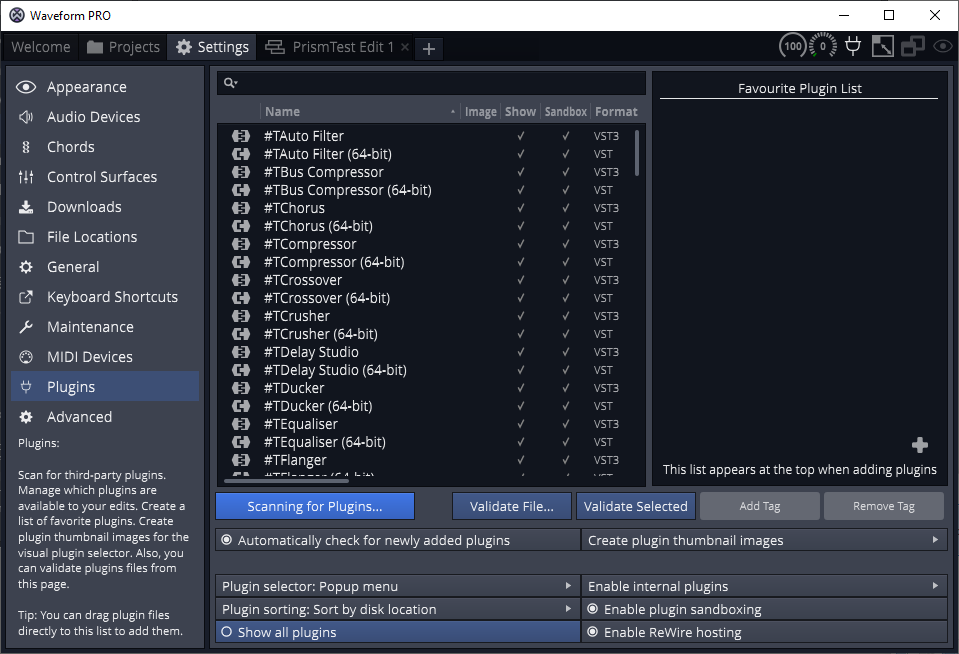
Pluginssection on the left. - Click the
Scanning for Plugins...button and selectScan for new or updated VST3 plugins.
page break
macOS
- Select
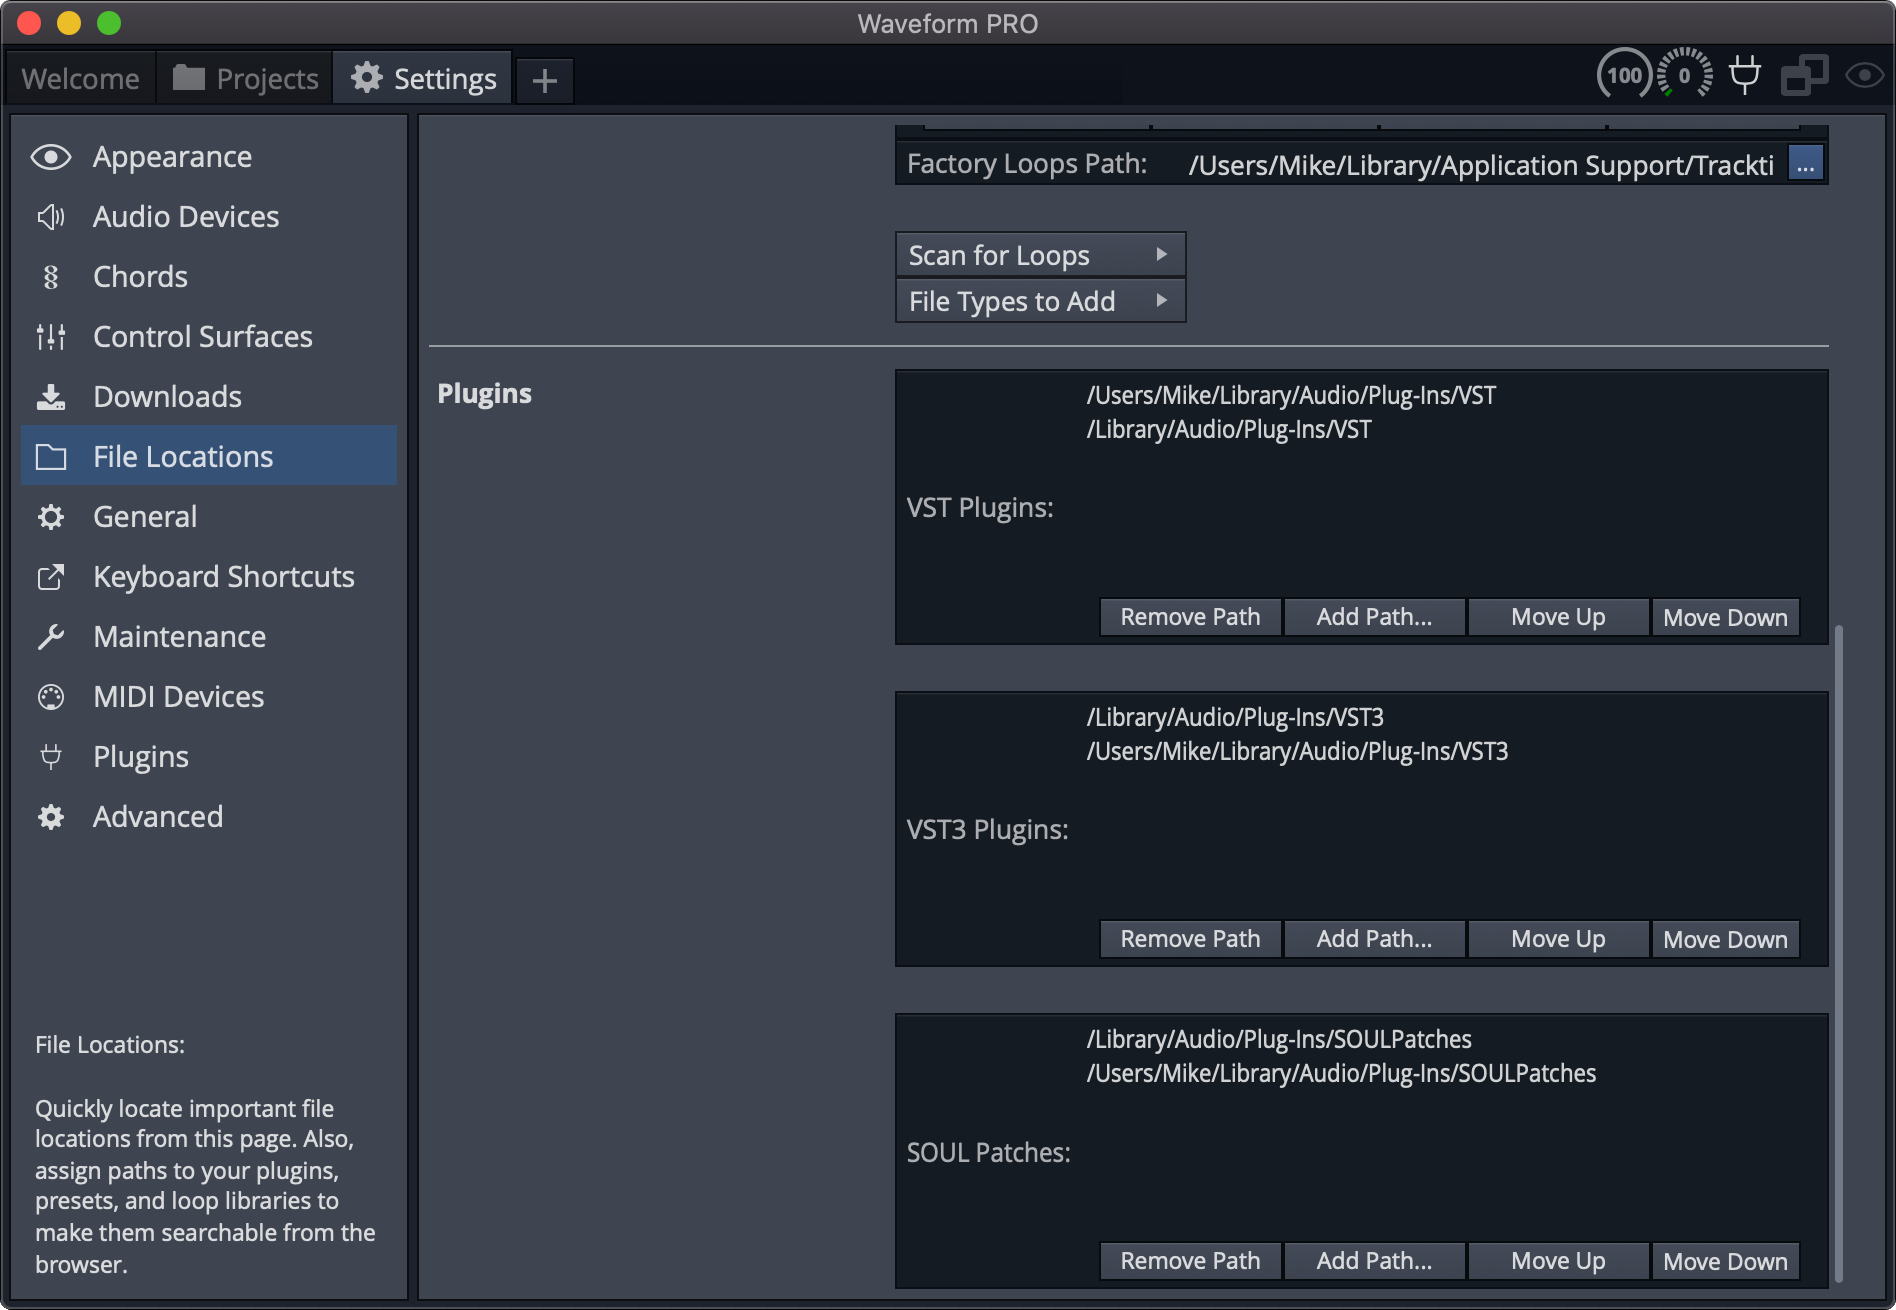
Settingsfrom the application title bar. - Select the
File Locationssection on the left, and scroll down to the Plugins area. - Ensure your system VST3 path is (
/Library/Audio/Plug-Ins/VST3) is included in the VST3 Plugins section. If not, click theAdd Path...button and add the system path.
- Select the
Pluginssection on the left. - Click the
Scanning for Plugins...button and selectScan for new or updated VST3 plugins.
